FREE Delivery £50+

Anarky Creations
- 04 Apr 2025
Paint Islands: Say Goodbye & Conquer your Canvas
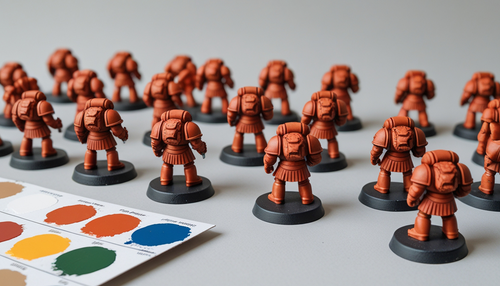
You’ve thinned your paints, primed your minis and yet, muscles look like patchwork, transitions harsh and highlights sit awkwardly like blobs of misplaced light. That’s the curse of paint islands. They disrupt the illusion of depth, break the flow of form and suck the realism out of your hard work. Let’s break down how to fix that.
What Are Paint Islands, Really?
Paint islands happen when paint sits on the miniature rather than working with its form. The most obvious culprits are raised areas. Overzealous shading or dry brushing creates chunky highlights with dark voids around them - making it look like the muscle is its own little continent. Isolated from the rest of the model. It’s not about colour choice, it’s about transition. Muscles aren’t flat planes with crisp edges they’re curves, bulges, and soft gradients. When you highlight them like hard-edged plates, you kill the depth.
Painting to Avoid Paint Islands
Here’s how to get your tones tight and transitions smooth—whether you're glazing, layering, or even slapping chop.
Visualise the Form
Before you load your brush, understand the surface you're painting. Look at the curve of a bicep, the ridge of a cheekbone, the roll of a cloak. Ask yourself:
- Where is the light hitting from?
- Where should the highlight end, not just begin?
- Is this a soft surface or a hard edge?
- Painting without understanding form is like shading in the dark.
Blend, Don’t Block
A common error is treating highlights and shadows like patches. If they do happen, you can glaze a midtone over the transitions to smooth them out after.
- Feather your strokes outward from the highlight
- Use thinned paint to build up slowly
- Layer midtones between shadow and light
Control Your Contrast
Yes, contrast is king but too much, too suddenly results in island territory. The goal is depth, not drama.
- Keep your highlights smaller than you think you need
- Use desaturated tones for smoother shifts between layers
- Push contrast gradually e.g. don’t jump from black to white in one coat
Mind the Midtones
It’s not just about highlights and shadow, midtones do the heavy lifting. Think of the midtone as the bridge that keeps your colours from becoming isolated paint islands.
- Use midtones to transition between extremes
- When dry brushing, go over the area lightly with a midtone wash or glaze to blend
- If the model looks chalky or too sharp, your midtone is missing in action

Common Pitfalls (and Fixes)
Highlighting too many muscles individually
Fix: Group muscles into larger forms and highlight the overall bulge.
Using pure white or bright tones too early
Fix: Reserve the brightest highlights for extreme spots - tips of the shoulders, brows, eye glints, knuckles.
Painting in poor lighting
Fix: Always work under strong, even light to spot gaps and over contrasts. A daylight lamp is ideal.
Over-dry brushing
Fix: Dry brush with control (use a dry palette), then glaze or blend back any harsh spots.
Paint Islands: Say Goodbye & Conquer your Canvas
Anarky Creations
- 04 Apr 2025
You’ve thinned your paints, primed your minis and yet, muscles look like patchwork, transitions harsh and highlights sit awkwardly like blobs of misplaced light. That’s the curse of paint islands. They disrupt the illusion of depth, break the flow of form and suck the realism out of your hard work. Let’s break down how to fix that.
What Are Paint Islands, Really?
Paint islands happen when paint sits on the miniature rather than working with its form. The most obvious culprits are raised areas. Overzealous shading or dry brushing creates chunky highlights with dark voids around them - making it look like the muscle is its own little continent. Isolated from the rest of the model. It’s not about colour choice, it’s about transition. Muscles aren’t flat planes with crisp edges they’re curves, bulges, and soft gradients. When you highlight them like hard-edged plates, you kill the depth.
Painting to Avoid Paint Islands
Here’s how to get your tones tight and transitions smooth—whether you're glazing, layering, or even slapping chop.
Visualise the Form
Before you load your brush, understand the surface you're painting. Look at the curve of a bicep, the ridge of a cheekbone, the roll of a cloak. Ask yourself:
- Where is the light hitting from?
- Where should the highlight end, not just begin?
- Is this a soft surface or a hard edge?
- Painting without understanding form is like shading in the dark.
Blend, Don’t Block
A common error is treating highlights and shadows like patches. If they do happen, you can glaze a midtone over the transitions to smooth them out after.
- Feather your strokes outward from the highlight
- Use thinned paint to build up slowly
- Layer midtones between shadow and light
Control Your Contrast
Yes, contrast is king but too much, too suddenly results in island territory. The goal is depth, not drama.
- Keep your highlights smaller than you think you need
- Use desaturated tones for smoother shifts between layers
- Push contrast gradually e.g. don’t jump from black to white in one coat
Mind the Midtones
It’s not just about highlights and shadow, midtones do the heavy lifting. Think of the midtone as the bridge that keeps your colours from becoming isolated paint islands.
- Use midtones to transition between extremes
- When dry brushing, go over the area lightly with a midtone wash or glaze to blend
- If the model looks chalky or too sharp, your midtone is missing in action
Common Pitfalls (and Fixes)
Highlighting too many muscles individually
Fix: Group muscles into larger forms and highlight the overall bulge.
Using pure white or bright tones too early
Fix: Reserve the brightest highlights for extreme spots - tips of the shoulders, brows, eye glints, knuckles.
Painting in poor lighting
Fix: Always work under strong, even light to spot gaps and over contrasts. A daylight lamp is ideal.
Over-dry brushing
Fix: Dry brush with control (use a dry palette), then glaze or blend back any harsh spots.
Frequently Asked Questions
F.A.Q
Related Posts
-
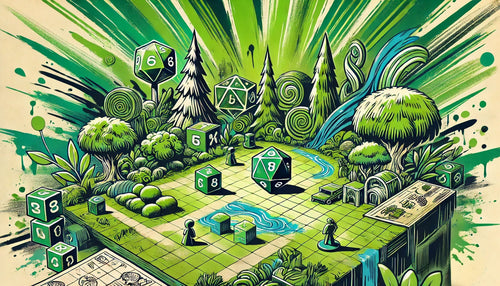
Batch Painting Miniatures: Using PM Skills
Facing the grey tide again? Could batch painting miniatures using project management skills could be the answer?
-
Concerned About Sustainability?
We explore the question - Are these games contributing to ecological harm, or is their impact relatively minor? The reality is complex.
-
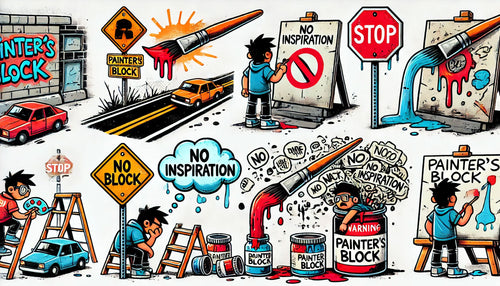
Overcoming Artists Block
Staring at a blank miniature, brush in hand. Stuck? It’s like writer’s block - frustrating but normal. Join us in tackling it.


