Dry Brush Control, Paint Consistency & Strokes

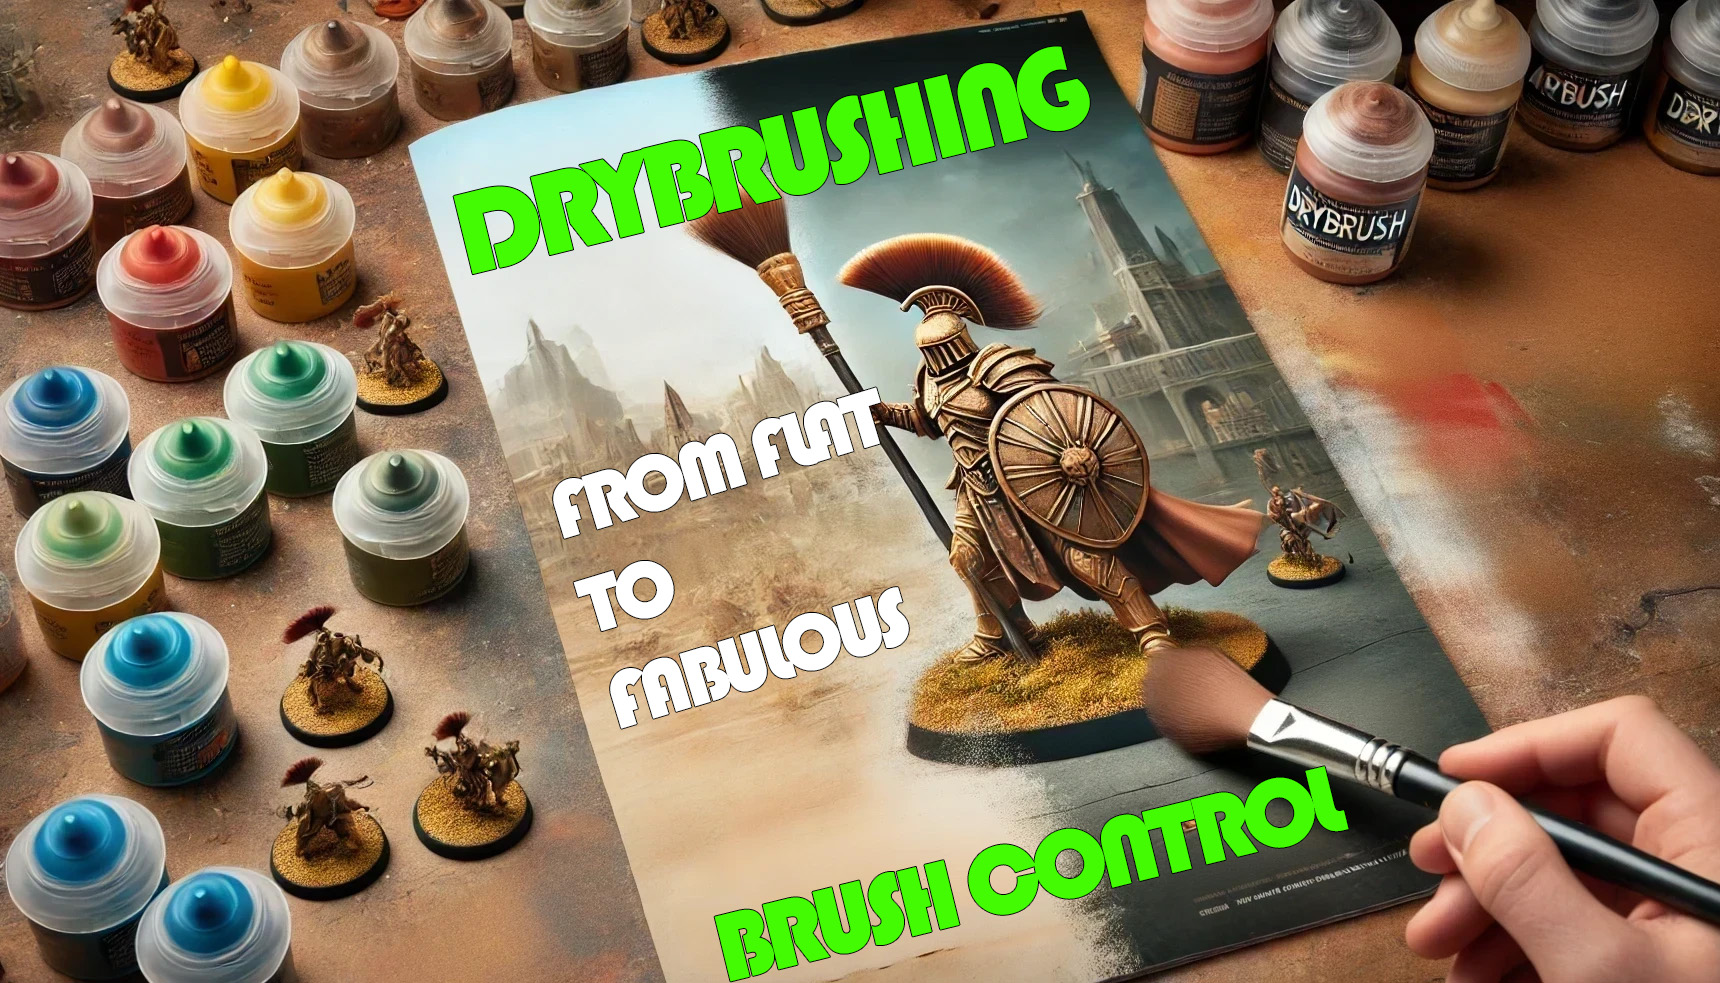
AI generated image of a magazine cover with a title to match the blog article. Brush control.

Building on the fundamentals, specialist dry brush control techniques allow artists to create more nuanced and realistic effects on their miniatures. It’s time to refine techniques by focusing on controlling your brush and your paint. Mastery will give you more precision and control over your dry brushing effects, allowing you to create smoother, more realistic finishes.

A key consideration is surface texture – the more pronounced the texture, the less likely you’ll see streaks or blobs. This is why it’s best to start practicing on highly textured surfaces for rewarding results before moving on to smoother, trickier surfaces.

Understanding Dry Brush Control

Dry brush control is essential for achieving subtle, natural-looking highlights rather than harsh streaks. This takes practice, but awareness is half the battle. By understanding how your brush interacts with the surface, planning and executing effects becomes easier. Here are a few key pointers to help you refine your technique:

  • STOP and assess – Learn when to stop before overworking.
  • Hold the brush lightly – A relaxed grip allows for fluid motion.
  • Use a featherlight touch – Skim the surface rather than pressing in.
  • Layer paint – Light applications are better than a single heavy coat.
  • Vary angles – Change brush direction to catch details differently and avoid uniformity.
  • Gain speed – As confidence grows, increasing speed can help blend colours more naturally.
  • Layer colour – Build up highlights gradually through lighter tones for a more natural look.
  • Experiment with brush size – Different brushes create different effects; test various shapes and sizes.
  • Adjust pressure – Find the balance between pressure and paint load for optimal results.

💡 Tip: Base coat stippling for terrain may require slightly more pressure than other dry brushing techniques – but not too much! Sometimes, a gentle roll of the brush helps.

Control Paint Quantity & Consistency

The consistency of your paint is crucial for effective dry brush control. Thicker, high-pigment paint works best, as thin washes won’t achieve the right effect.

How to Prepare Your Brush

After loading your brush, wipe most of the paint off on a dry palette until only a faint residue remains. Despite being referred to as dry brushing, it’s actually better for the paint to not be completely dehydrated. Overly dehydrated paint is far more likely to streak and blob. Finally, test before applying – a popular method is brush a few strokes on the back of a hand to ensure the paint feels dry enough.

Why a Dry Palette Works Best

Using a dry palette for dry brushing offers superior control, efficiency, and consistency compared to a kitchen towel. Unlike absorbent paper, a dry palette:

  • Prevents paint from drying too quickly.
  • Maintains the right consistency, ensuring better pigment retention.
  • Minimizes waste by allowing paint to remain usable longer.
  • Provides a stable surface for blending before application.

💡 Bonus Tip: Completely dehydrated paint is more likely to streak or blob. A textured dry palette or dampening pad helps maintain the right balance!

Control Dry Brush Strokes

Different brush strokes create different textures and effects. While there are countless nuances, here’s a breakdown of key techniques. The model’s surface should dictate which technique you use.

Stippling 🎨

✔ Best for: Weathering, rust, terrain, organic textures like rough skin or battle-worn armour.

  • Position the brush perpendicular to the surface.
  • Light dabbing motions instead of brushstrokes.
  • Build up highlights gradually on raised areas.
  • Blend transitions between colours for smoother effects.

💡 Variation: Base coat stippling works well for terrain! Try a darker stipple first, then layer lighter tones.

Circular Highlighting 🎨

✔ Best for: Rounded surfaces like rocks, leather, and smooth organic highlights.

  • Use small, overlapping circular motions with minimal pressure.
  • Focus on raised areas to gradually build highlights.
  • Blend transitions between colours smoothly.

Directional Highlighting 🎨

✔ Best for: Textured surfaces like fur, feathers, or fabric.

  • Identify the natural texture flow of the model.
  • Back and forth strokes in the same direction.
  • Emphasise natural movement by following the sculpted texture.

Speed Skim Highlighting 🎨

✔ Best for: Larger expanses and for highlighting surfaces that have already been base coat stippled.

  • Featherlight strokes with only the tips of the bristles.
  • Flick or skim back and forth over the surface.
  • Observe the model’s shape to apply highlights naturally.

Edge Highlighting 🎨

✔ Best for: Defining raised edges, particularly on armour, rocky surfaces, or sharp metal edges.

  • Angle the bristles to lightly skim across edges, not along them.
  • Use a bisectional technique—transfer paint to edges without hitting recesses.
  • Adjust pressure and stroke direction based on the surface.

💡 For best results, plan your highlight placement before starting!

Control Light – Object Source Lighting

✔ Best for: Creating a glowing light effect from a single source (e.g., a lantern, spell, or glowing eyes).

While OSL is advanced, dry brushing can contribute to soft, diffused lighting effects. Learning this early helps build awareness of light direction and intensity.

How to Approach OSL

  • Identify the light source and direction (e.g., overhead sunlight or a torch glow).
  • Determine colour and intensity (e.g., blue for magic, orange for fire).
  • Use thin layers to gradually build up the glow.
  • The brightest point should be nearly white at the source.
  • Darken areas where the light wouldn’t reach to enhance realism.

💡 Tip: Struggling to visualize OSL? Turn off the lights and use a torch to see where natural light falls on the model!

Practice Exercise: Dry Brush Control

To develop better brush control and consistency, try this simple exercise on a base or section of terrain. To be able to read the surface, make a plan that considers light and use a range of techniques to execute it is the ultimate goal.

Step by Step:

1️⃣ Select a piece of terrain, ideally with a mix of small/larger features (e.g; moss, gravel, rocks, debris)
2️⃣Prime in a dark shade.
3️⃣ Stipple a mid-tone base coat on moss/gravel areas.
4️⃣ Stipple a lighter tone with less coverage.
5️⃣ Skim highlight with a highlight tone.
6️⃣ Base coat larger objects like rocks and debris.
7️⃣ Use directional or circular highlighting to emphasize form.
8️⃣ Apply edge highlighting to define raised edges.
9️⃣ Observe how light interacts with the terrain.

Conclusion

Mastering dry brushing requires practice, patience, and experimentation. The more you experiment with surfaces, paint consistencies, and brush applications, the better your results will be. Don’t hesitate to combine dry brushing with glazes and washes to enhance depth and texture.

By honing your brush control, perfecting paint consistency, and refining your stroke techniques, you’ll see a noticeable improvement in the quality of your work.

Next up in Part #3: Enhancing realism with materials like skin, cloth, and leather!

🎨 Happy painting! 🎨
10% OFF

GET 10% OFF YOUR ORDER AT OUR ETSY SHOP

Visit our HOME PAGE – subscribe to get your code.

Powered by Mailchimp

Dry Brush Control, Paint Consistency & Strokes

AI generated image of a magazine cover with a title to match the blog article. Brush control.

Building on the fundamentals, specialist dry brush control techniques allow artists to create more nuanced and realistic effects on their miniatures. It’s time to refine techniques by focusing on controlling your brush and your paint. Mastery will give you more precision and control over your dry brushing effects, allowing you to create smoother, more realistic finishes.

A key consideration is surface texture – the more pronounced the texture, the less likely you’ll see streaks or blobs. This is why it’s best to start practicing on highly textured surfaces for rewarding results before moving on to smoother, trickier surfaces.

Understanding Dry Brush Control

Dry brush control is essential for achieving subtle, natural-looking highlights rather than harsh streaks. This takes practice, but awareness is half the battle. By understanding how your brush interacts with the surface, planning and executing effects becomes easier. Here are a few key pointers to help you refine your technique:

  • STOP and assess – Learn when to stop before overworking.
  • Hold the brush lightly – A relaxed grip allows for fluid motion.
  • Use a featherlight touch – Skim the surface rather than pressing in.
  • Layer paint – Light applications are better than a single heavy coat.
  • Vary angles – Change brush direction to catch details differently and avoid uniformity.
  • Gain speed – As confidence grows, increasing speed can help blend colours more naturally.
  • Layer colour – Build up highlights gradually through lighter tones for a more natural look.
  • Experiment with brush size – Different brushes create different effects; test various shapes and sizes.
  • Adjust pressure – Find the balance between pressure and paint load for optimal results.

💡 Tip: Base coat stippling for terrain may require slightly more pressure than other dry brushing techniques – but not too much! Sometimes, a gentle roll of the brush helps.

Control Paint Quantity & Consistency

The consistency of your paint is crucial for effective dry brush control. Thicker, high-pigment paint works best, as thin washes won’t achieve the right effect.

How to Prepare Your Brush

After loading your brush, wipe most of the paint off on a dry palette until only a faint residue remains. Despite being referred to as dry brushing, it’s actually better for the paint to not be completely dehydrated. Overly dehydrated paint is far more likely to streak and blob. Finally, test before applying – a popular method is brush a few strokes on the back of a hand to ensure the paint feels dry enough.

Why a Dry Palette Works Best

Using a dry palette for dry brushing offers superior control, efficiency, and consistency compared to a kitchen towel. Unlike absorbent paper, a dry palette:

  • Prevents paint from drying too quickly.
  • Maintains the right consistency, ensuring better pigment retention.
  • Minimizes waste by allowing paint to remain usable longer.
  • Provides a stable surface for blending before application.

💡 Bonus Tip: Completely dehydrated paint is more likely to streak or blob. A textured dry palette or dampening pad helps maintain the right balance!

Control Dry Brush Strokes

Different brush strokes create different textures and effects. While there are countless nuances, here’s a breakdown of key techniques. The model’s surface should dictate which technique you use.

Stippling 🎨

✔ Best for: Weathering, rust, terrain, organic textures like rough skin or battle-worn armour.

  • Position the brush perpendicular to the surface.
  • Light dabbing motions instead of brushstrokes.
  • Build up highlights gradually on raised areas.
  • Blend transitions between colours for smoother effects.

💡 Variation: Base coat stippling works well for terrain! Try a darker stipple first, then layer lighter tones.

Circular Highlighting 🎨

✔ Best for: Rounded surfaces like rocks, leather, and smooth organic highlights.

  • Use small, overlapping circular motions with minimal pressure.
  • Focus on raised areas to gradually build highlights.
  • Blend transitions between colours smoothly.

Directional Highlighting 🎨

✔ Best for: Textured surfaces like fur, feathers, or fabric.

  • Identify the natural texture flow of the model.
  • Back and forth strokes in the same direction.
  • Emphasise natural movement by following the sculpted texture.

Speed Skim Highlighting 🎨

✔ Best for: Larger expanses and for highlighting surfaces that have already been base coat stippled.

  • Featherlight strokes with only the tips of the bristles.
  • Flick or skim back and forth over the surface.
  • Observe the model’s shape to apply highlights naturally.

Edge Highlighting 🎨

✔ Best for: Defining raised edges, particularly on armour, rocky surfaces, or sharp metal edges.

  • Angle the bristles to lightly skim across edges, not along them.
  • Use a bisectional technique—transfer paint to edges without hitting recesses.
  • Adjust pressure and stroke direction based on the surface.

💡 For best results, plan your highlight placement before starting!

Control Light – Object Source Lighting

✔ Best for: Creating a glowing light effect from a single source (e.g., a lantern, spell, or glowing eyes).

While OSL is advanced, dry brushing can contribute to soft, diffused lighting effects. Learning this early helps build awareness of light direction and intensity.

How to Approach OSL

  • Identify the light source and direction (e.g., overhead sunlight or a torch glow).
  • Determine colour and intensity (e.g., blue for magic, orange for fire).
  • Use thin layers to gradually build up the glow.
  • The brightest point should be nearly white at the source.
  • Darken areas where the light wouldn’t reach to enhance realism.

💡 Tip: Struggling to visualize OSL? Turn off the lights and use a torch to see where natural light falls on the model!

Practice Exercise: Dry Brush Control

To develop better brush control and consistency, try this simple exercise on a base or section of terrain. To be able to read the surface, make a plan that considers light and use a range of techniques to execute it is the ultimate goal.

Step by Step:

1️⃣ Select a piece of terrain, ideally with a mix of small/larger features (e.g; moss, gravel, rocks, debris)
2️⃣Prime in a dark shade.
3️⃣ Stipple a mid-tone base coat on moss/gravel areas.
4️⃣ Stipple a lighter tone with less coverage.
5️⃣ Skim highlight with a highlight tone.
6️⃣ Base coat larger objects like rocks and debris.
7️⃣ Use directional or circular highlighting to emphasize form.
8️⃣ Apply edge highlighting to define raised edges.
9️⃣ Observe how light interacts with the terrain.

Conclusion

Mastering dry brushing requires practice, patience, and experimentation. The more you experiment with surfaces, paint consistencies, and brush applications, the better your results will be. Don’t hesitate to combine dry brushing with glazes and washes to enhance depth and texture.

By honing your brush control, perfecting paint consistency, and refining your stroke techniques, you’ll see a noticeable improvement in the quality of your work.

Next up in Part #3: Enhancing realism with materials like skin, cloth, and leather!

🎨 Happy painting! 🎨
10% OFF

GET 10% OFF YOUR ORDER AT OUR ETSY SHOP

Visit our HOME PAGE – subscribe to get your code.

Powered by Mailchimp

Dry Brush Control, Paint Consistency & Strokes

AI generated image of a magazine cover with a title to match the blog article. Brush control.

Building on the fundamentals, specialist dry brush control techniques allow artists to create more nuanced and realistic effects on their miniatures. It’s time to refine techniques by focusing on controlling your brush and your paint. Mastery will give you more precision and control over your dry brushing effects, allowing you to create smoother, more realistic finishes.

A key consideration is surface texture – the more pronounced the texture, the less likely you’ll see streaks or blobs. This is why it’s best to start practicing on highly textured surfaces for rewarding results before moving on to smoother, trickier surfaces.

Understanding Dry Brush Control

Dry brush control is essential for achieving subtle, natural-looking highlights rather than harsh streaks. This takes practice, but awareness is half the battle. By understanding how your brush interacts with the surface, planning and executing effects becomes easier. Here are a few key pointers to help you refine your technique:

  • STOP and assess – Learn when to stop before overworking.
  • Hold the brush lightly – A relaxed grip allows for fluid motion.
  • Use a featherlight touch – Skim the surface rather than pressing in.
  • Layer paint – Light applications are better than a single heavy coat.
  • Vary angles – Change brush direction to catch details differently and avoid uniformity.
  • Gain speed – As confidence grows, increasing speed can help blend colours more naturally.
  • Layer colour – Build up highlights gradually through lighter tones for a more natural look.
  • Experiment with brush size – Different brushes create different effects; test various shapes and sizes.
  • Adjust pressure – Find the balance between pressure and paint load for optimal results.

💡 Tip: Base coat stippling for terrain may require slightly more pressure than other dry brushing techniques – but not too much! Sometimes, a gentle roll of the brush helps.

Control Paint Quantity & Consistency

The consistency of your paint is crucial for effective dry brush control. Thicker, high-pigment paint works best, as thin washes won’t achieve the right effect.

How to Prepare Your Brush

After loading your brush, wipe most of the paint off on a dry palette until only a faint residue remains. Despite being referred to as dry brushing, it’s actually better for the paint to not be completely dehydrated. Overly dehydrated paint is far more likely to streak and blob. Finally, test before applying – a popular method is brush a few strokes on the back of a hand to ensure the paint feels dry enough.

Why a Dry Palette Works Best

Using a dry palette for dry brushing offers superior control, efficiency, and consistency compared to a kitchen towel. Unlike absorbent paper, a dry palette:

  • Prevents paint from drying too quickly.
  • Maintains the right consistency, ensuring better pigment retention.
  • Minimizes waste by allowing paint to remain usable longer.
  • Provides a stable surface for blending before application.

💡 Bonus Tip: Completely dehydrated paint is more likely to streak or blob. A textured dry palette or dampening pad helps maintain the right balance!

Control Dry Brush Strokes

Different brush strokes create different textures and effects. While there are countless nuances, here’s a breakdown of key techniques. The model’s surface should dictate which technique you use.

Stippling 🎨

✔ Best for: Weathering, rust, terrain, organic textures like rough skin or battle-worn armour.

  • Position the brush perpendicular to the surface.
  • Light dabbing motions instead of brushstrokes.
  • Build up highlights gradually on raised areas.
  • Blend transitions between colours for smoother effects.

💡 Variation: Base coat stippling works well for terrain! Try a darker stipple first, then layer lighter tones.

Circular Highlighting 🎨

✔ Best for: Rounded surfaces like rocks, leather, and smooth organic highlights.

  • Use small, overlapping circular motions with minimal pressure.
  • Focus on raised areas to gradually build highlights.
  • Blend transitions between colours smoothly.

Directional Highlighting 🎨

✔ Best for: Textured surfaces like fur, feathers, or fabric.

  • Identify the natural texture flow of the model.
  • Back and forth strokes in the same direction.
  • Emphasise natural movement by following the sculpted texture.

Speed Skim Highlighting 🎨

✔ Best for: Larger expanses and for highlighting surfaces that have already been base coat stippled.

  • Featherlight strokes with only the tips of the bristles.
  • Flick or skim back and forth over the surface.
  • Observe the model’s shape to apply highlights naturally.

Edge Highlighting 🎨

✔ Best for: Defining raised edges, particularly on armour, rocky surfaces, or sharp metal edges.

  • Angle the bristles to lightly skim across edges, not along them.
  • Use a bisectional technique—transfer paint to edges without hitting recesses.
  • Adjust pressure and stroke direction based on the surface.

💡 For best results, plan your highlight placement before starting!

Control Light – Object Source Lighting

✔ Best for: Creating a glowing light effect from a single source (e.g., a lantern, spell, or glowing eyes).

While OSL is advanced, dry brushing can contribute to soft, diffused lighting effects. Learning this early helps build awareness of light direction and intensity.

How to Approach OSL

  • Identify the light source and direction (e.g., overhead sunlight or a torch glow).
  • Determine colour and intensity (e.g., blue for magic, orange for fire).
  • Use thin layers to gradually build up the glow.
  • The brightest point should be nearly white at the source.
  • Darken areas where the light wouldn’t reach to enhance realism.

💡 Tip: Struggling to visualize OSL? Turn off the lights and use a torch to see where natural light falls on the model!

Practice Exercise: Dry Brush Control

To develop better brush control and consistency, try this simple exercise on a base or section of terrain. To be able to read the surface, make a plan that considers light and use a range of techniques to execute it is the ultimate goal.

Step by Step:

1️⃣ Select a piece of terrain, ideally with a mix of small/larger features (e.g; moss, gravel, rocks, debris)
2️⃣Prime in a dark shade.
3️⃣ Stipple a mid-tone base coat on moss/gravel areas.
4️⃣ Stipple a lighter tone with less coverage.
5️⃣ Skim highlight with a highlight tone.
6️⃣ Base coat larger objects like rocks and debris.
7️⃣ Use directional or circular highlighting to emphasize form.
8️⃣ Apply edge highlighting to define raised edges.
9️⃣ Observe how light interacts with the terrain.

Conclusion

Mastering dry brushing requires practice, patience, and experimentation. The more you experiment with surfaces, paint consistencies, and brush applications, the better your results will be. Don’t hesitate to combine dry brushing with glazes and washes to enhance depth and texture.

By honing your brush control, perfecting paint consistency, and refining your stroke techniques, you’ll see a noticeable improvement in the quality of your work.

Next up in Part #3: Enhancing realism with materials like skin, cloth, and leather!

🎨 Happy painting! 🎨

LATEST ARTICLES

10% OFF

GET 10% OFF YOUR ORDER AT OUR ETSY SHOP

Visit our HOME PAGE – subscribe to get your code.

Powered by Mailchimp